Building a Roster Pattern involves adding as many days as required to complete the cycle. For example, creating an 8-day roster pattern will repeat every 8 days, while a 21-day pattern will repeat every 21 days, and so on.
Day 1 of the Roster Pattern will always be the starting point for the Roster Position, establishing the beginning of each cycle.
In this example, we will build a Roster Pattern that starts with 2 Day Shifts, 2 Evening Shifts, 2 Night Shifts and then 4 days off.
Add Roster Pattern Day
In the Pattern Builder, +Add Blank Pattern Day
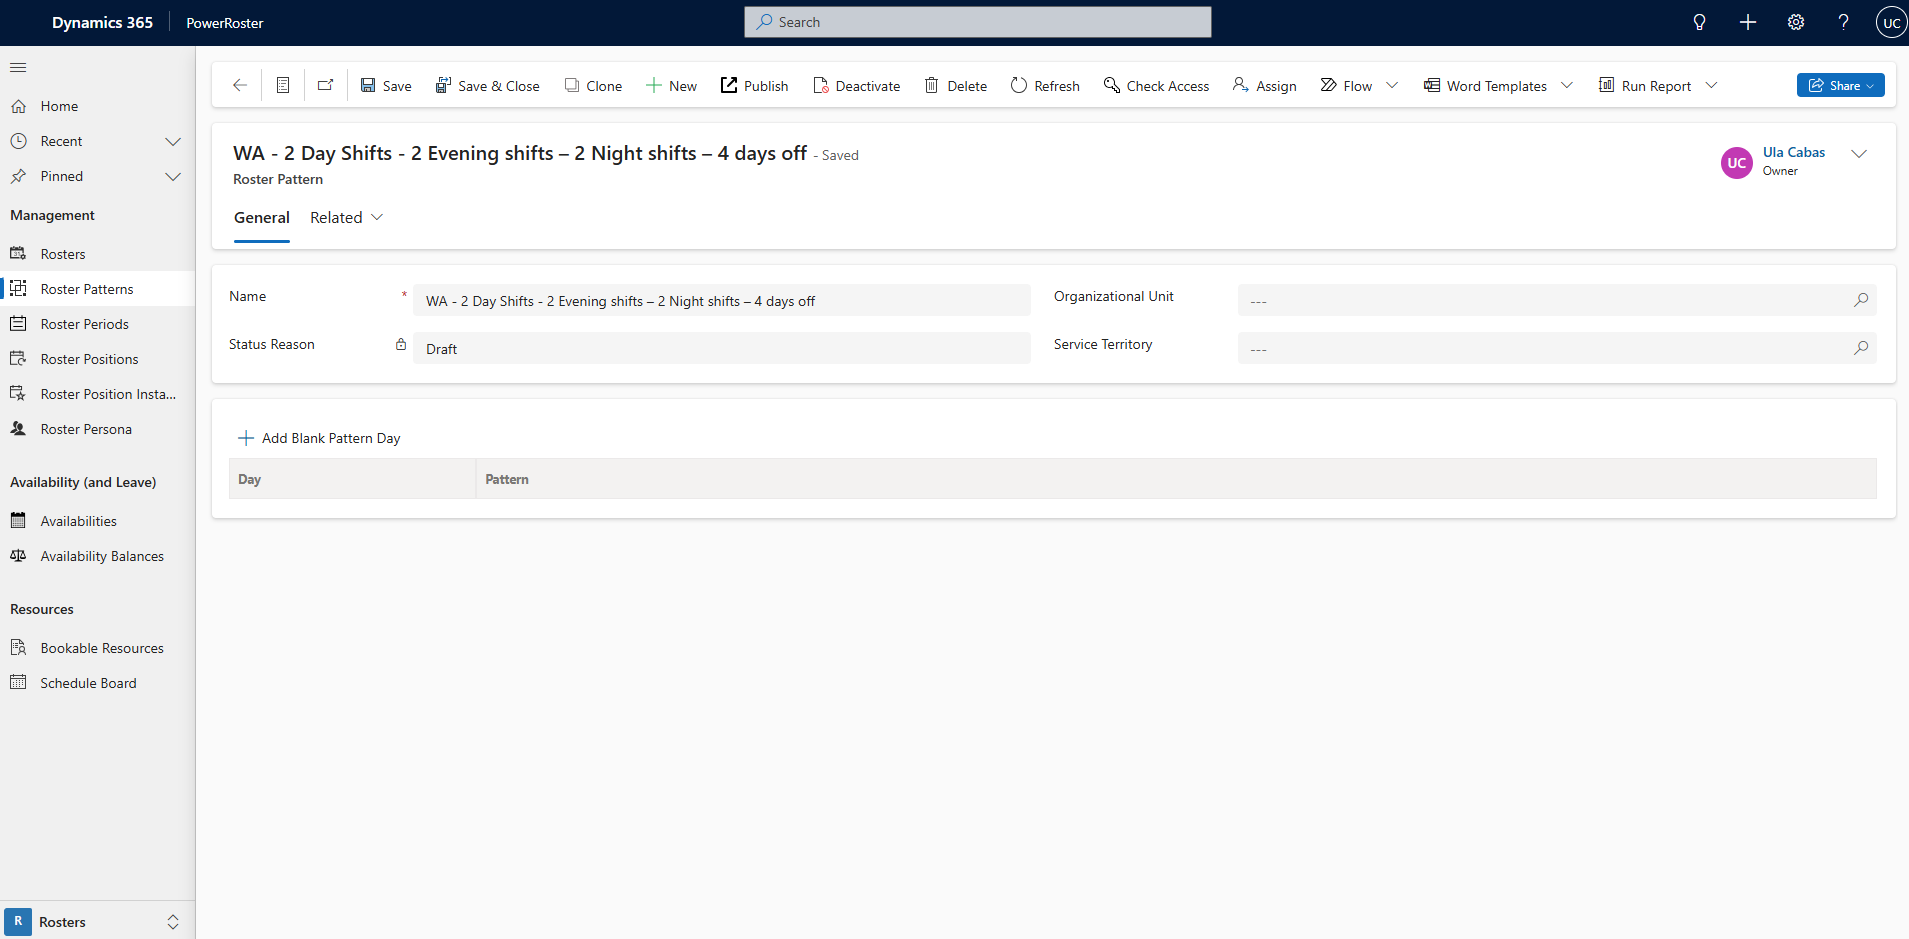
Select the Calendar icon
.png) to Edit the Pattern Day 1.
to Edit the Pattern Day 1.Update Roster Pattern Day and Save.
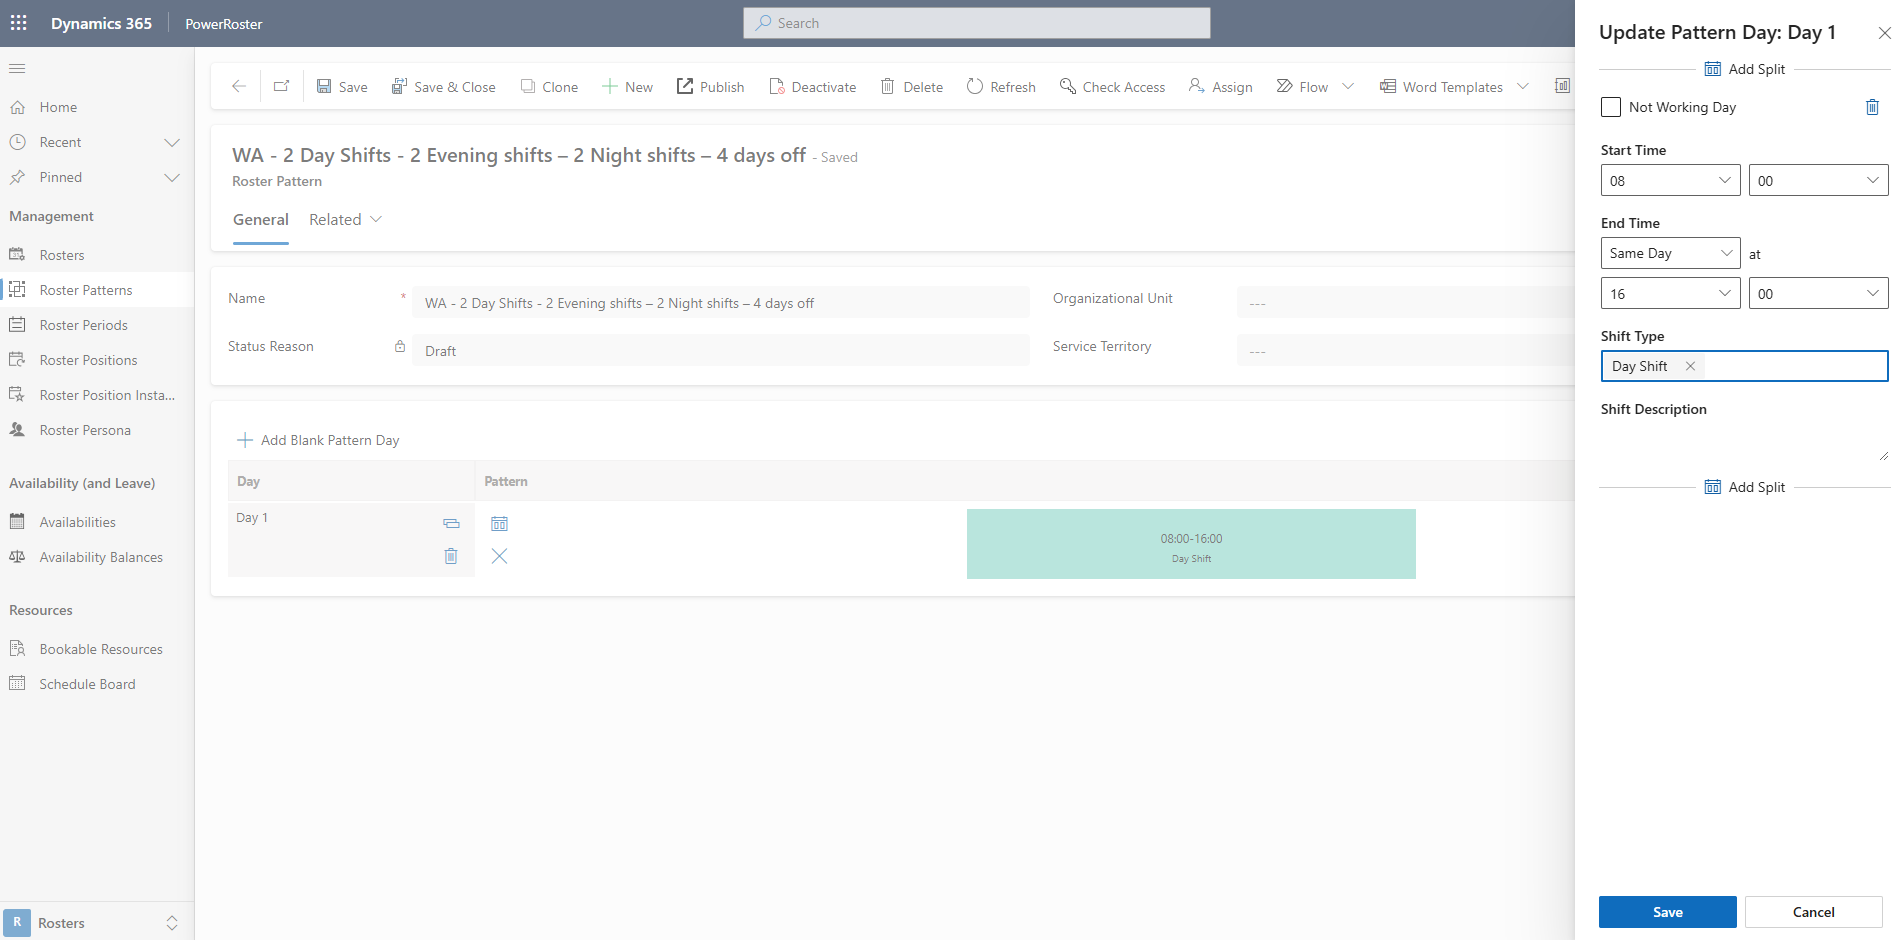
Field | Description |
Start Time | Start time of the Roster Pattern Day (shift). |
End Time | End time of the Roster Pattern Day (shift). |
Shift Type | Select the Shift Type, which shows the day Shift Colour on the Roster Calendar view. For More information on configuring Shift Types see Administration – Configuration Data – Shift Types. |
Not Working Day | To indicate that the shift is a Non-Working Day (RDO). |
Shift Description | Text field to add additional comments for this Shift. Note: This description is copied over to any RPIs generated using this pattern |
Add Split | To split a shift, such as for lunch breaks or other intervals throughout the day (see Adding a Split Shift below) |
Roster Pattern Day Options:
Once you start to build the Roster Pattern, you will be presented with the following buttons:
Field | Description |
+Add Blank Pattern Day | Add blank Pattern day as required to complete the Roster Pattern. Adding a blank Pattern Day always adds to after the last day of the pattern |
Duplicate Pattern Icon | To copy the selected Day Pattern. The copied Day always adds to after the last day of the pattern. |
Trash Icon | Deletes the Day Pattern. |
Edit Pattern | Opens menu to update Roster Pattern Day details. |
X Icon | Clears the existing Pattern Day. |
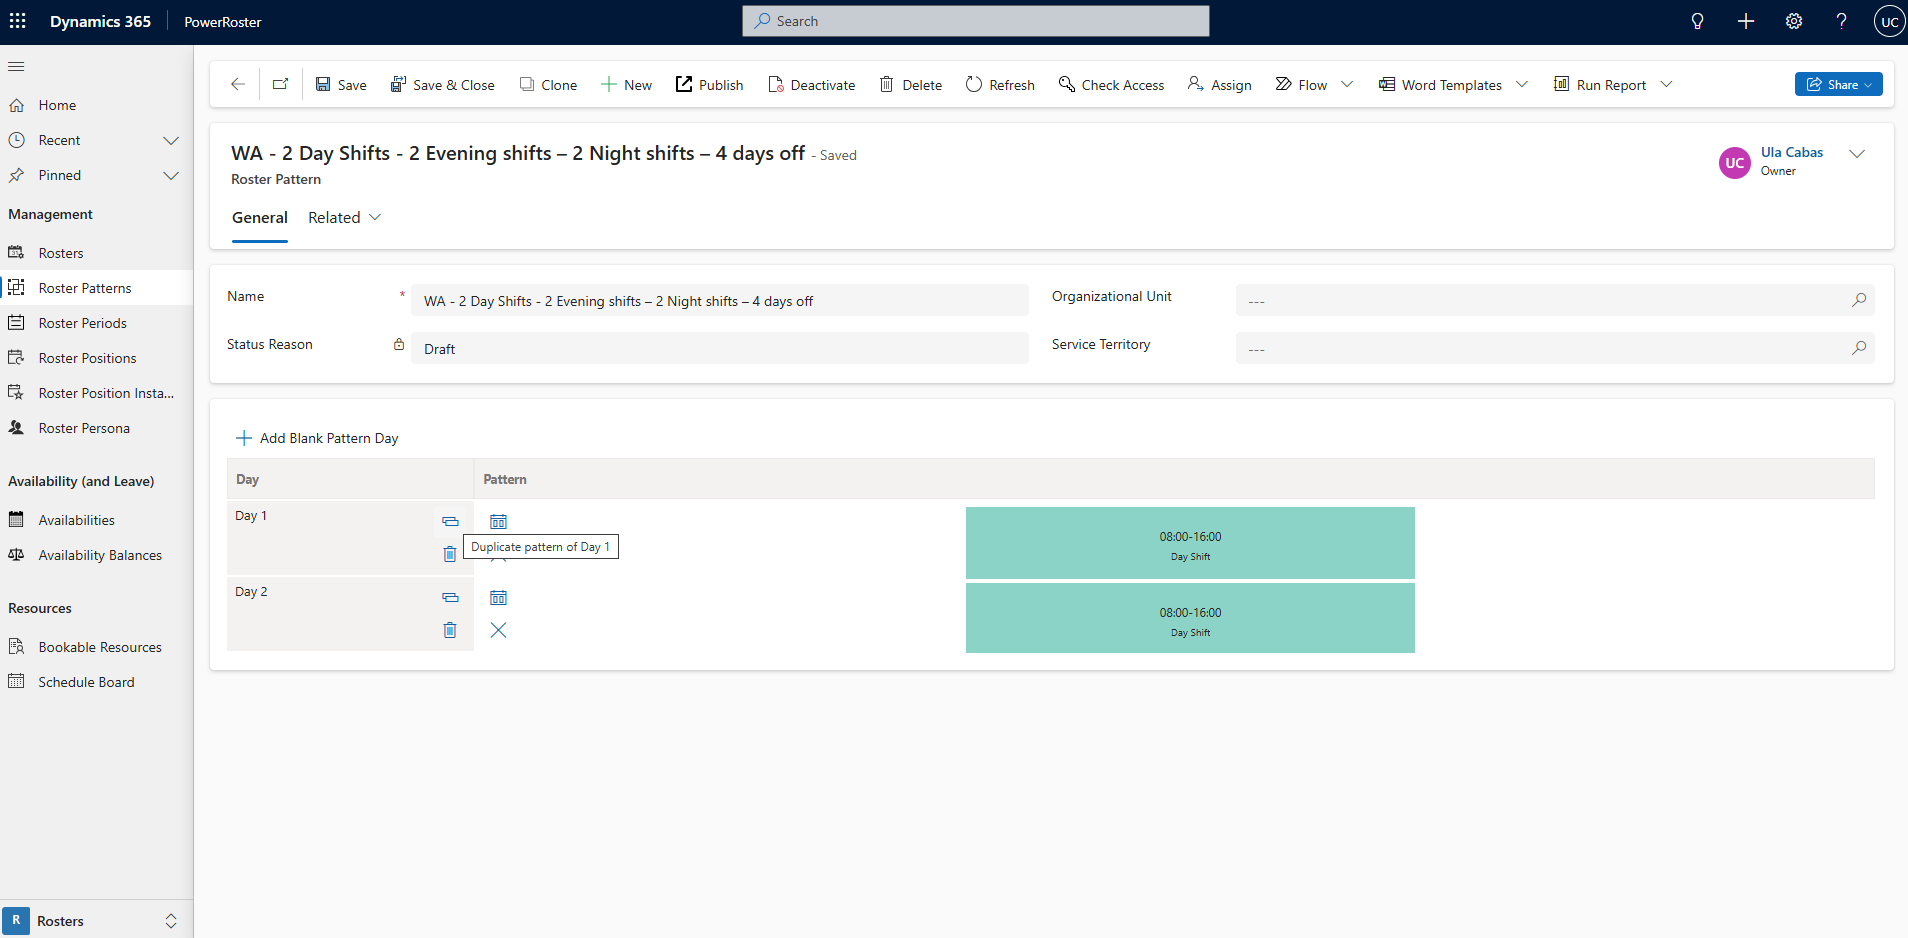
Select the Duplicate Pattern Icon
.png) to copy the day pattern (as in this example, the shifts on Day 1 and Day 2 are the same.)
to copy the day pattern (as in this example, the shifts on Day 1 and Day 2 are the same.)
Adding Not Working Day (RDO)
Many organisations have a concept of RDO (Roster Day Off), which is created for scenarios such as rostering workers to work a specific pattern of “work” days followed by “off” days.
In the Pattern Builder, +Add Blank Pattern Day and select the Calendar icon
.png) to Edit the Pattern Day 1 as shown below.
to Edit the Pattern Day 1 as shown below.Select the Not Working Day field.
Check the Start Time and End Time. If scheduling 24 hours for the RDO, make sure the End Time is set to ‘Next Day’ and Save.
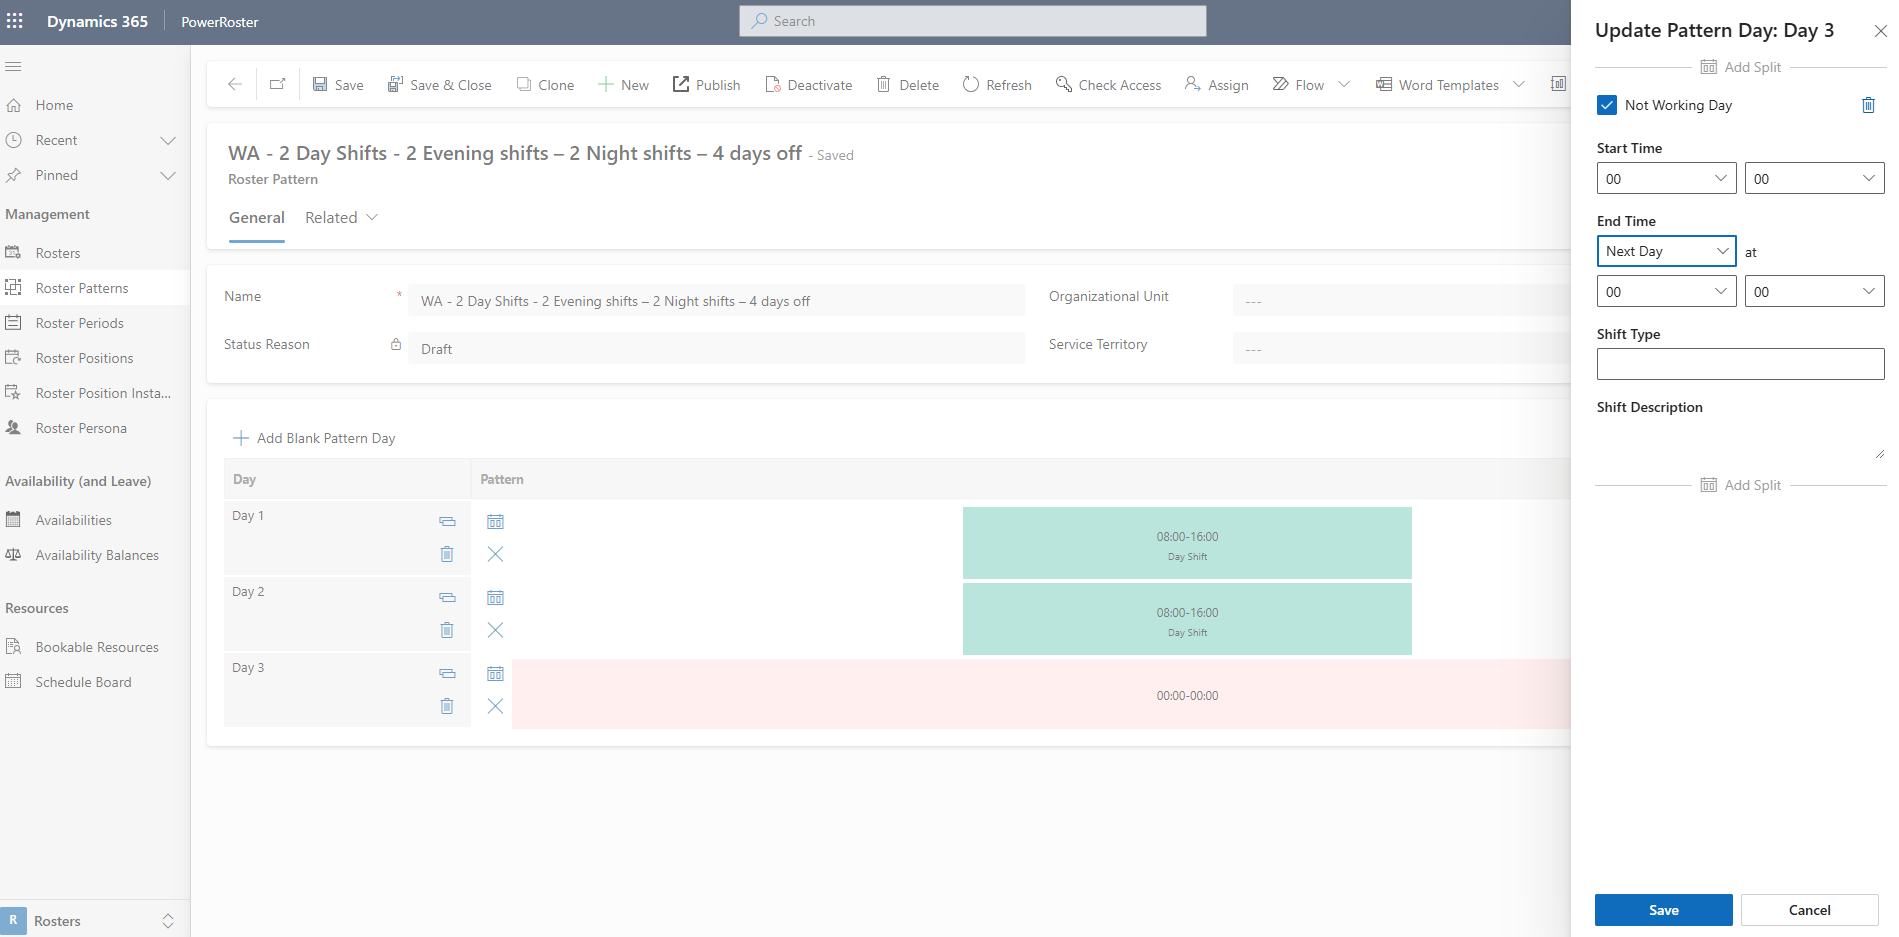
Example: If the start time is 00 and the end time is the next day, it means this resource cannot be booked for the entire day.
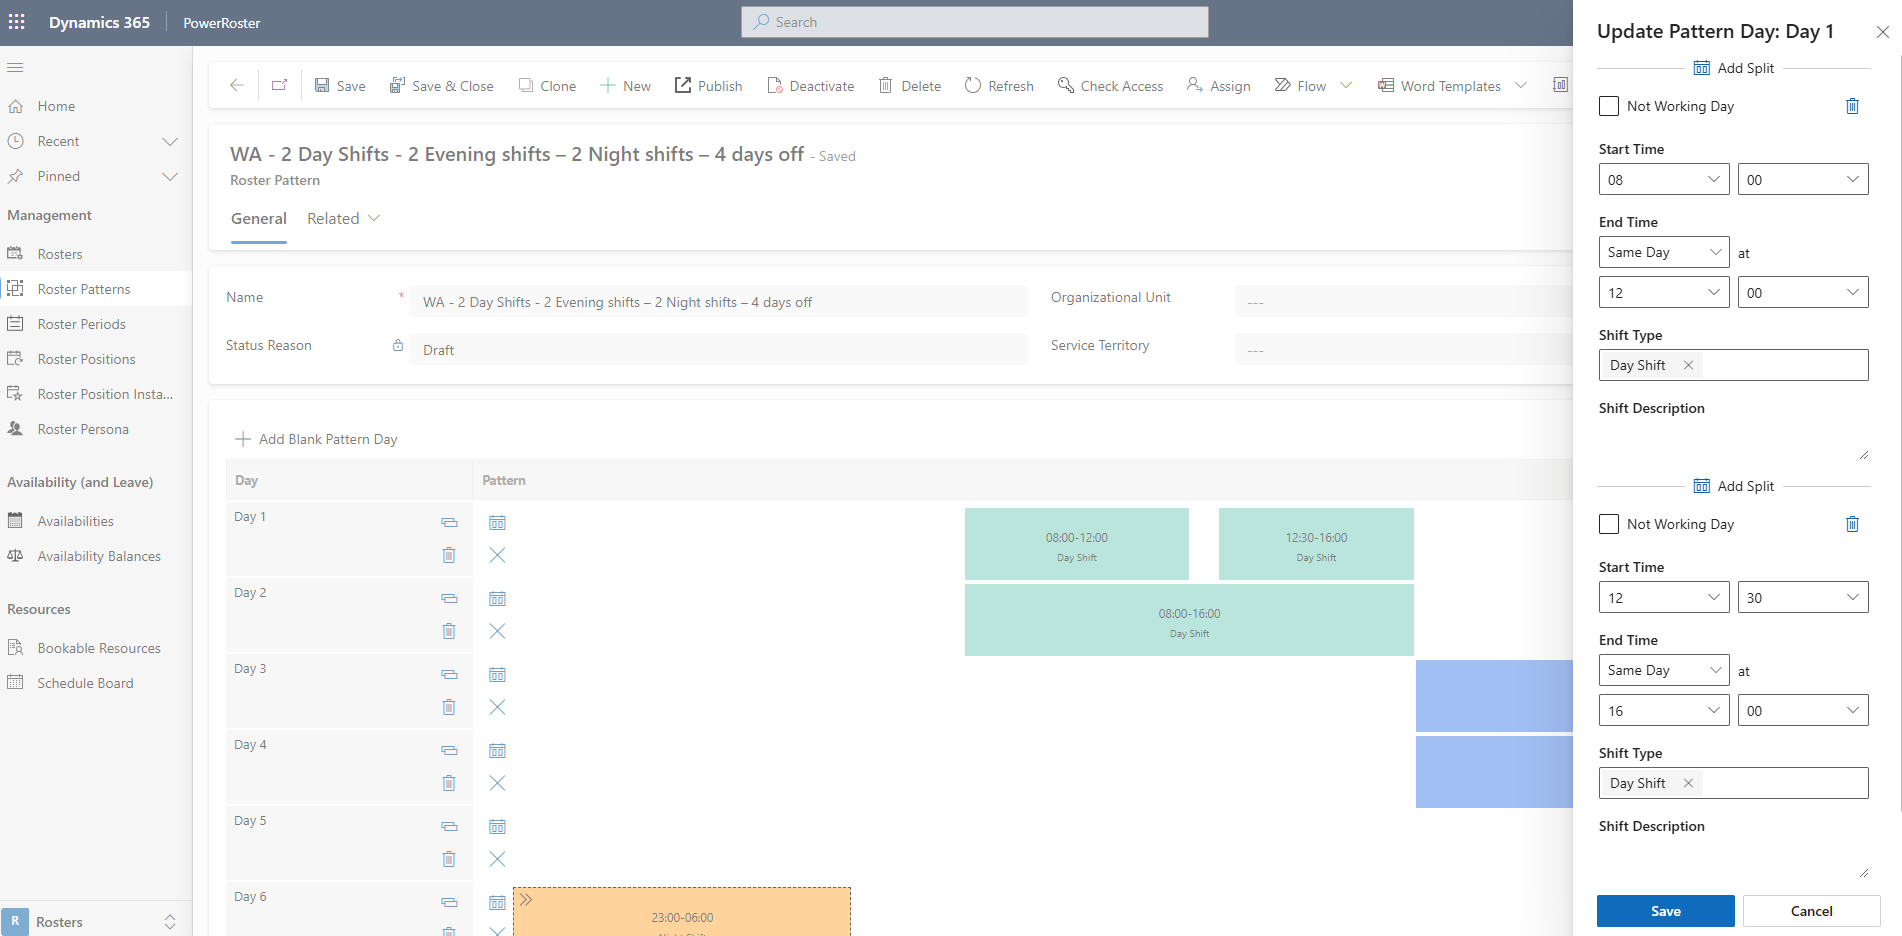
Add a Split Shift
Adding a shift split allows you to create a split during the shift, e.g., lunch or breaks during the day.
In the Pattern Builder, select the Calendar icon
.png) to Edit the Pattern Day 1 you want to add spilt as shown below.
to Edit the Pattern Day 1 you want to add spilt as shown below.Select Add Split
.png) .
.Update the Start Time and End time for each split to match your requirements.
Save.
Add an Inter-day Shift (overnight)
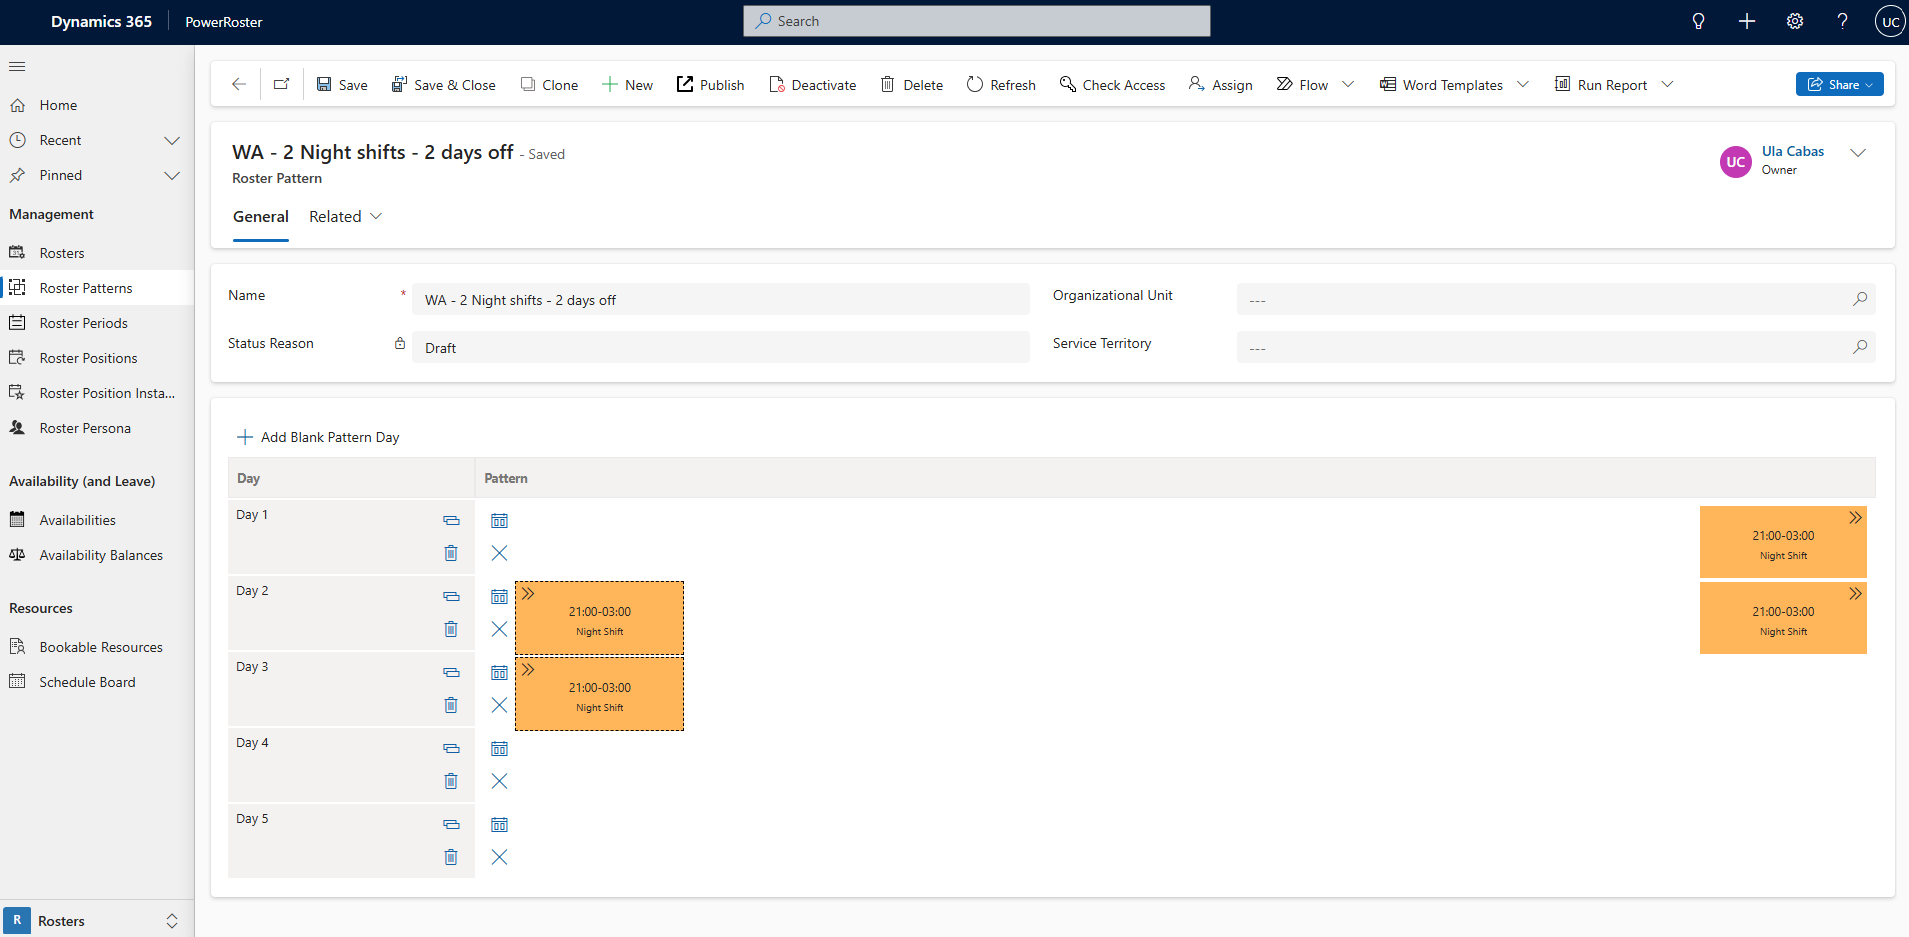
A shift that continues into or beyond midnight. For the example below, this night shift crosses from Day 1 to Day 2.
In the Pattern Builder, +Add Blank Pattern Day and select the Calendar icon
.png) to Edit the Pattern Day as shown below.
to Edit the Pattern Day as shown below.
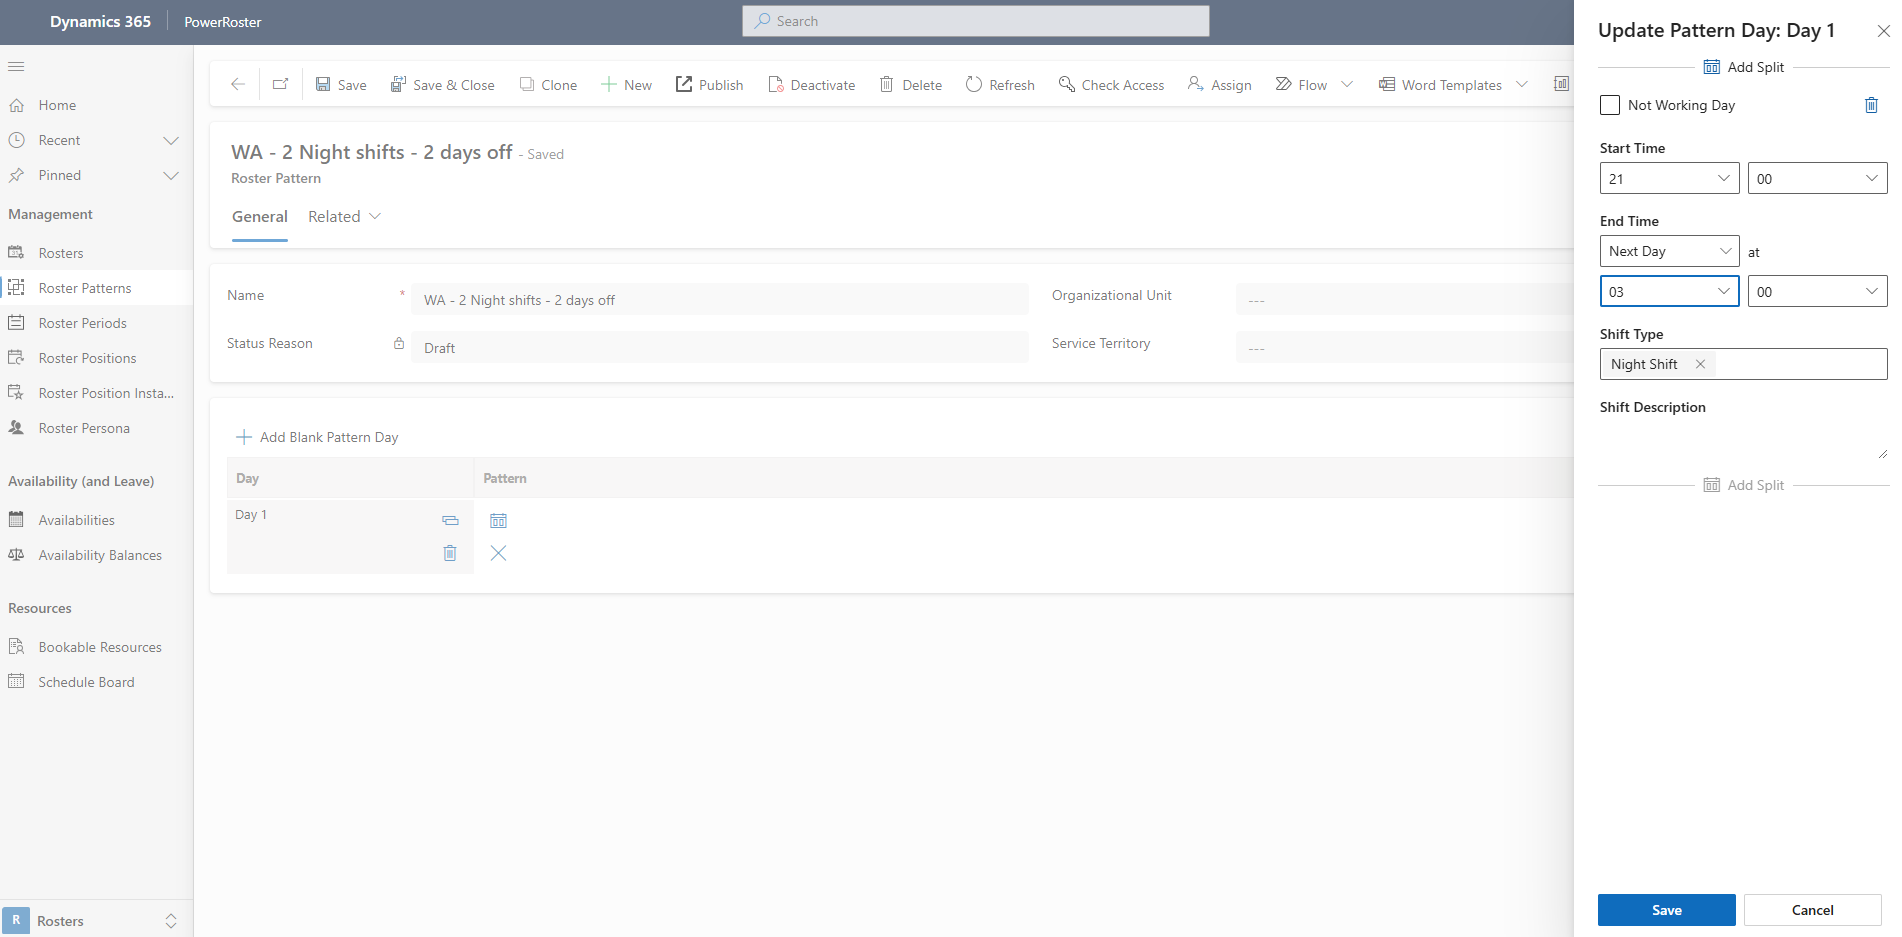
Fill in the Start Time and End Time as Next Day.
Save.
Example: A night shift created on Day 1 starts at 9:00 PM on Day 1 and ends at 3:00 AM on Day 2. Similarly, another night shift created for Day 2 starts at 9:00 PM on Day 2 and ends at 3:00 AM on Day 3.
.png)
.png)
.png)
.png)
.png)