Roster Positions represent a logical grouping of resource requirements based on persona (skills/characteristics), working patterns, date range, and role within a particular roster.
A Roster consists of a collection of Roster Positions that represent the roles within the roster that need to be filled. Roster Positions combine Roster Patterns (Work Patterns) and Roster Personas (skills required) to streamline shift management, ensure adequate coverage, and maintain compliance by aligning the right resources with the right tasks.
Create Roster Position
Navigate to PowerRoster App > Rosters > Calendar.
.png)
Click on '+Add a Position' icon.
.png)
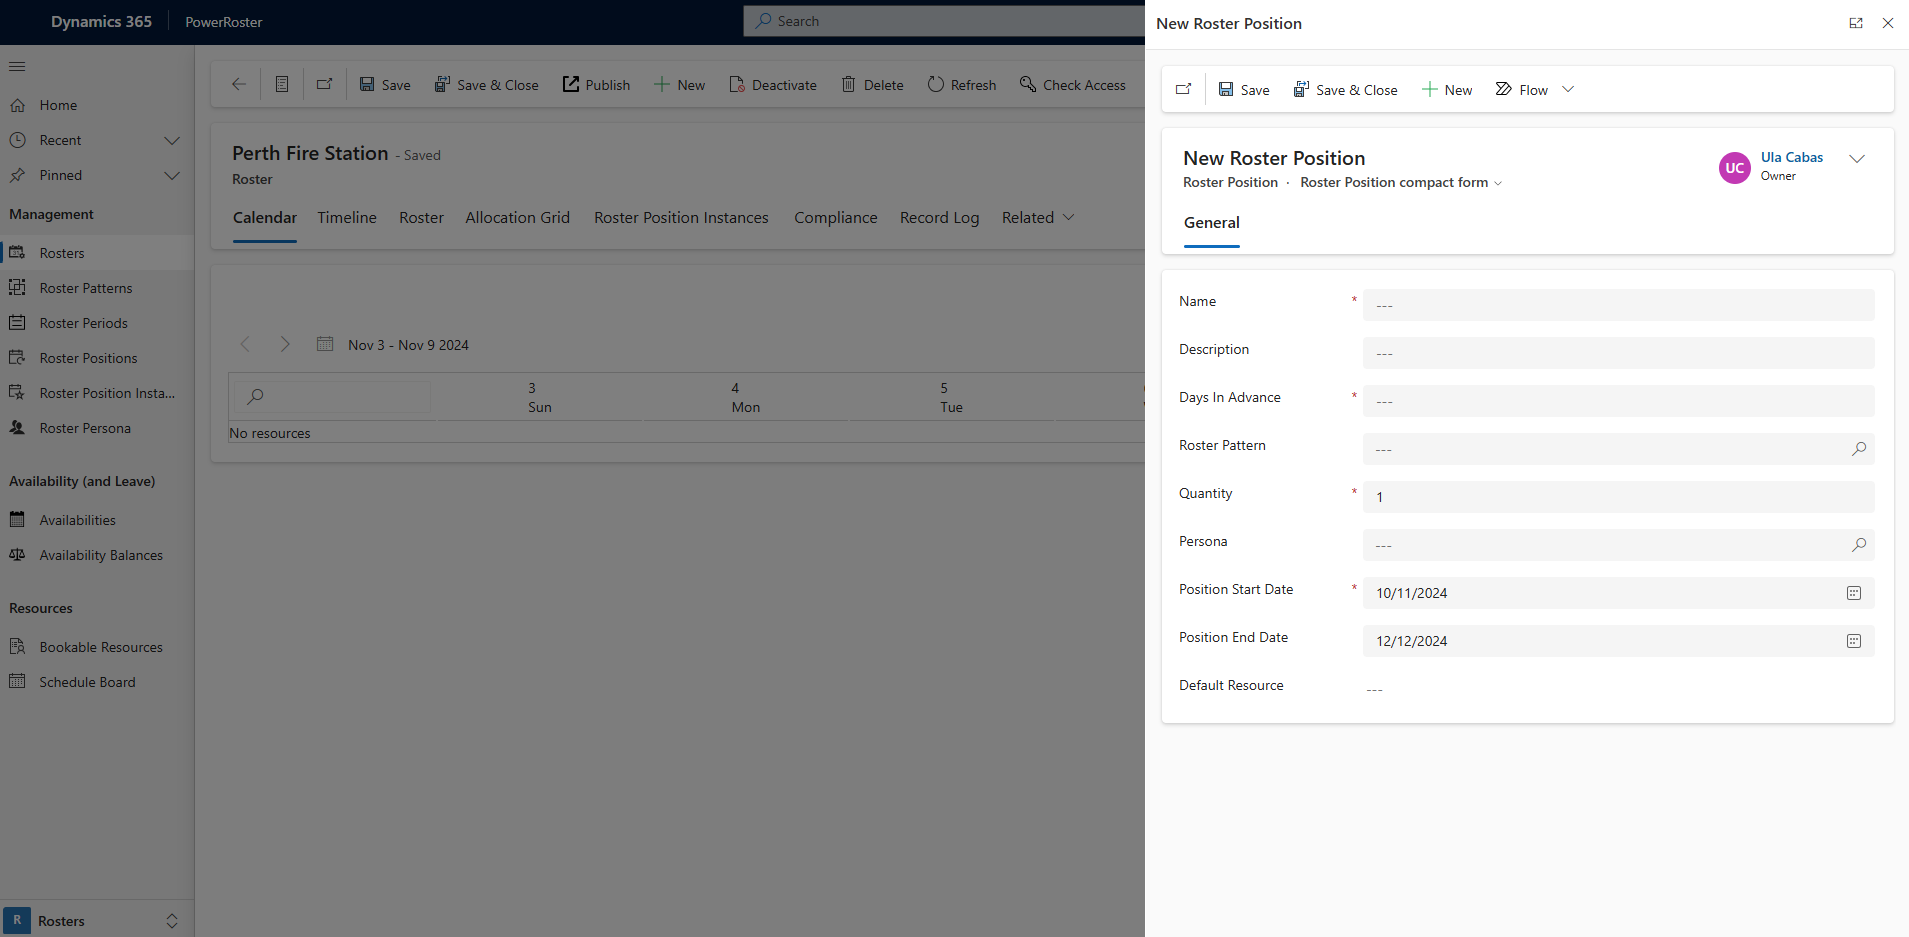
Fill in the required fields and Save.
Field | Description |
*Name | Enter the name of the Roster Position as it will appear on the Roster Calendar |
Description | Additional information that can be associated with this Roster Position for future reference |
*Days in Advance | Specify how many days in advance shifts should be generated. Position instances will be created this many days in advance to notify the resource of their allocated shift. |
Roster Pattern | Indicates the pattern for scheduling a resource, such as 4-day shifts followed by 3 days off. The roster pattern determines what shifts will be generated for the position. |
*Quantity | Specifies the number of Allocations required under a single Position. This can be used if multiple allocations require the same Roster Pattern and Persona. |
Persona | Defines the characteristics and skills required for the resource. While not mandatory, it becomes essential when searching for a Bookable Resource with specific skills. |
*Position Start Date | Defaults to the Roster Start Date, and can be set to any date after the Roster Start Date (and before the Roster End Date) |
Position End Date | Defaults to the Roster End Date (if applicable) but can be set to any date between the Roster Start and End Dates. |
Default Resource | Visible only if the Roster Position Quantity is set to 1. This is a lookup to a Bookable Resource, enabling allocation of the Roster Position to a resource. |
Notes
The "Days in Advance" field specifies how many days before a shift a Position Instance will be created to notify the Frontline Worker of their assigned shift. For example, if today is December 21, 2024, and your roster starts on January 1, 2025 and ends on January 30, 2025, with the "Days in Advance" set to 40, the Position Instance will be generated 40 days in advance, to notify the Frontline Worker of their allocation.
Roster Position Instances (RPI) will not be generated until both the Roster Pattern is determined and the "Days in Advance" field is correctly configured.
Select Save.
After the Roster Position is saved, Roster Position Instances (shifts) will start generating, and users will be notified via a banner. Users can refresh the page to check the updated status of the generation process. Once the banner disappears, it indicates that all shifts have been successfully generated.
A summary of the generated shifts can be viewed in the roll-up fields at the bottom of the Roster Position.
Example - Using Default Resource
The Default Resource field is visible only when the Quantity field is set to 1.
If a default resource has been assigned to an account in the account settings, the lookup will automatically filter to display that default resource. This enables easy allocation of the roster position to a bookable resource.
.png)
Example - Create a Position with Multiple Allocations
Once the Roster Positions have been created, Resources can be assigned to each allocation. For more details, refer to Allocate Resource.
.png)
Roster Positions can be created with a specified quantity when there is a need to schedule multiple resources with the same combination of skills and work patterns.
Shift Generation
The shifts generated for the roster position are determined by the roster pattern specified when creating the roster position.