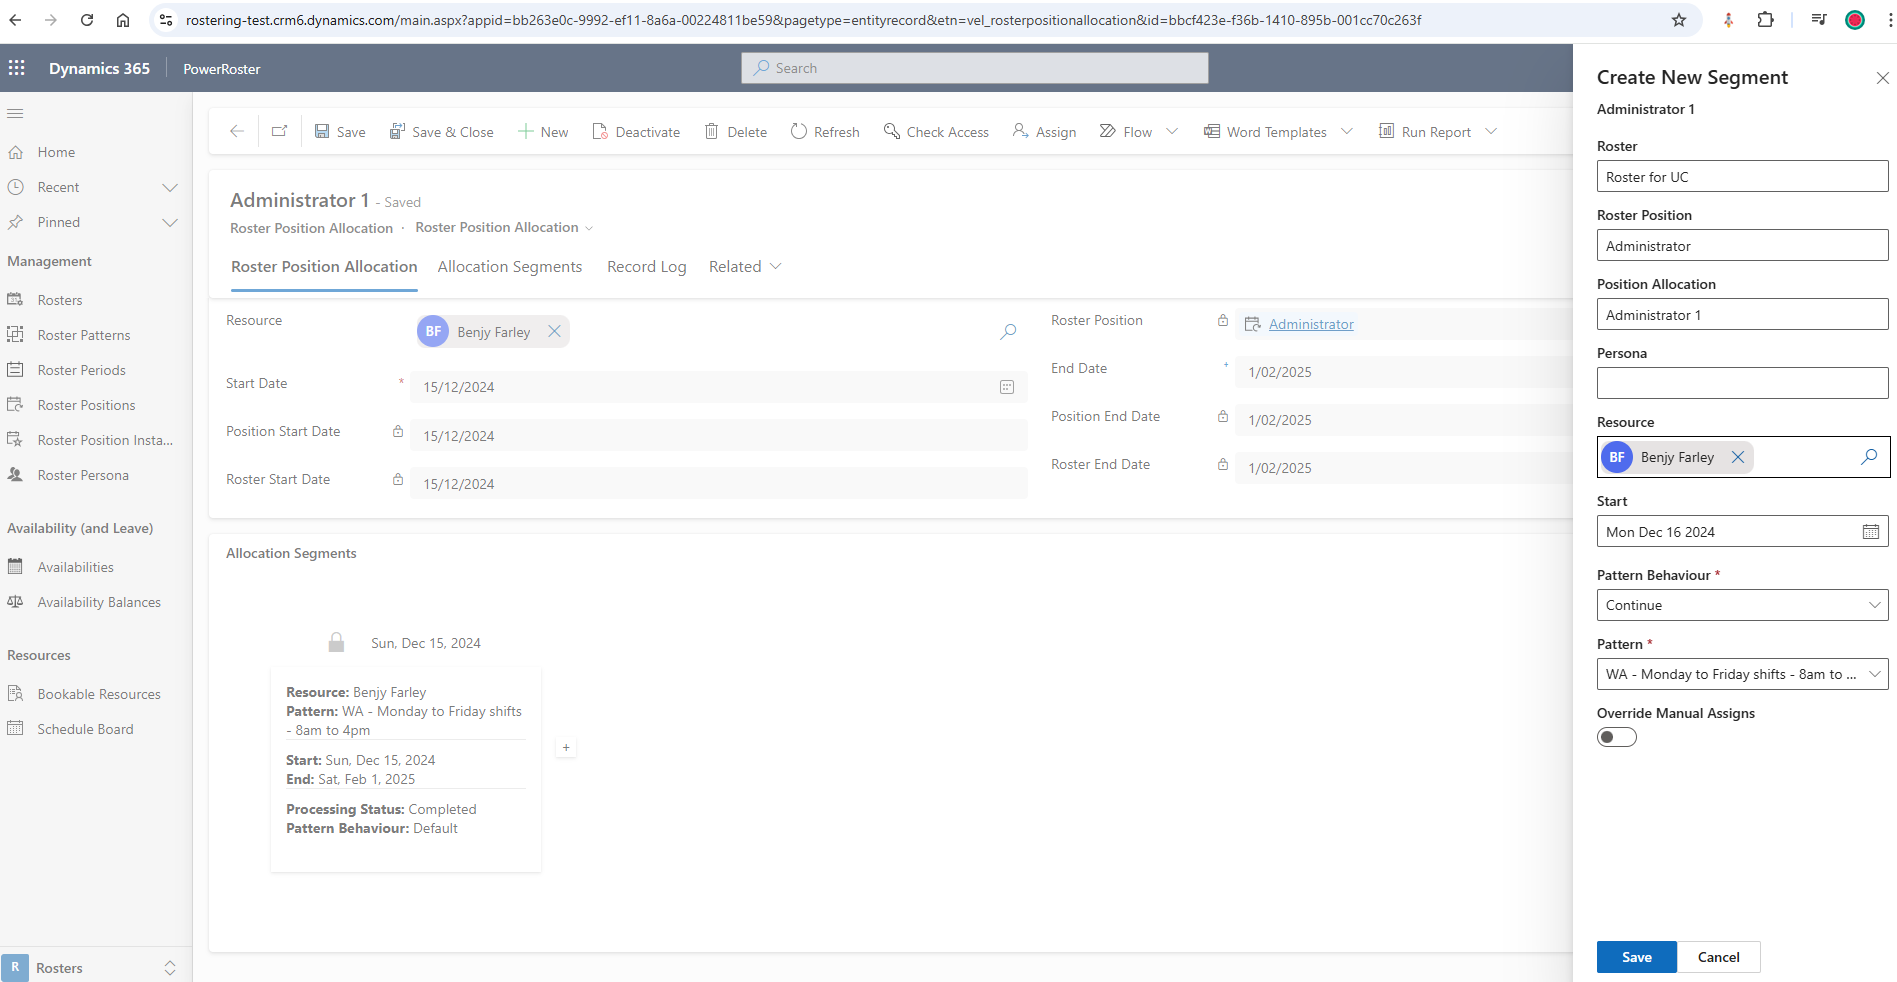
Navigate to Roster Position Allocation > Go to Allocation Segments Section.
Select + to create a new segment.

Fill in the required fields and Save.
Field | Description |
Roster | Roster name will be populated from the Roster |
Roster Position | Roster Position will be populated from the Roster |
Roster Allocation | Roster Allocation will be populated from the Roster |
Persona | Persona will be populated from the linked Position |
Resource | Select Resource from the lookup |
Start | Specify Start Date of the Segment |
*Pattern Behaviour | This will impact the segment's behaviour, including whether patterns continue, reset, or use custom configurations. There are five options available: Default: Defaults to the start date of the roster. Continue: Allows the pattern from the previous segment to continue into the new segment, maintaining consistency in scheduling. Reset: Resets the pattern to its initial state as defined in the first segment. This is useful when establishing a new pattern for the segment. Custom: Enables flexible scheduling based on specific needs. Custom patterns can begin any day, offering flexibility in managing shifts and schedules. None: No pattern is applied |
*Pattern | Select the Roster Pattern to be used in this segment. |
Override Manual Assigns | Change the toggle to "active" if you want to override the manual assignment. Segment will only apply changes to shifts that have not been manually reassigned or had their start/end times updated. Enabling this will also force updates to those shifts. |
After the engine processes, the Roster will display a change in Pattern, reflecting the Segments generated.
Note
You can create a segment for each instance where the Resource and/or Pattern needs to change during the allocation period.
A segment is automatically created when the Roster Position Allocation is generated.