This guide explains how to configure Persona Card templates by adding custom fields into the FetchXML query, mapping them into App Settings, and referencing them within the Persona Card configuration.
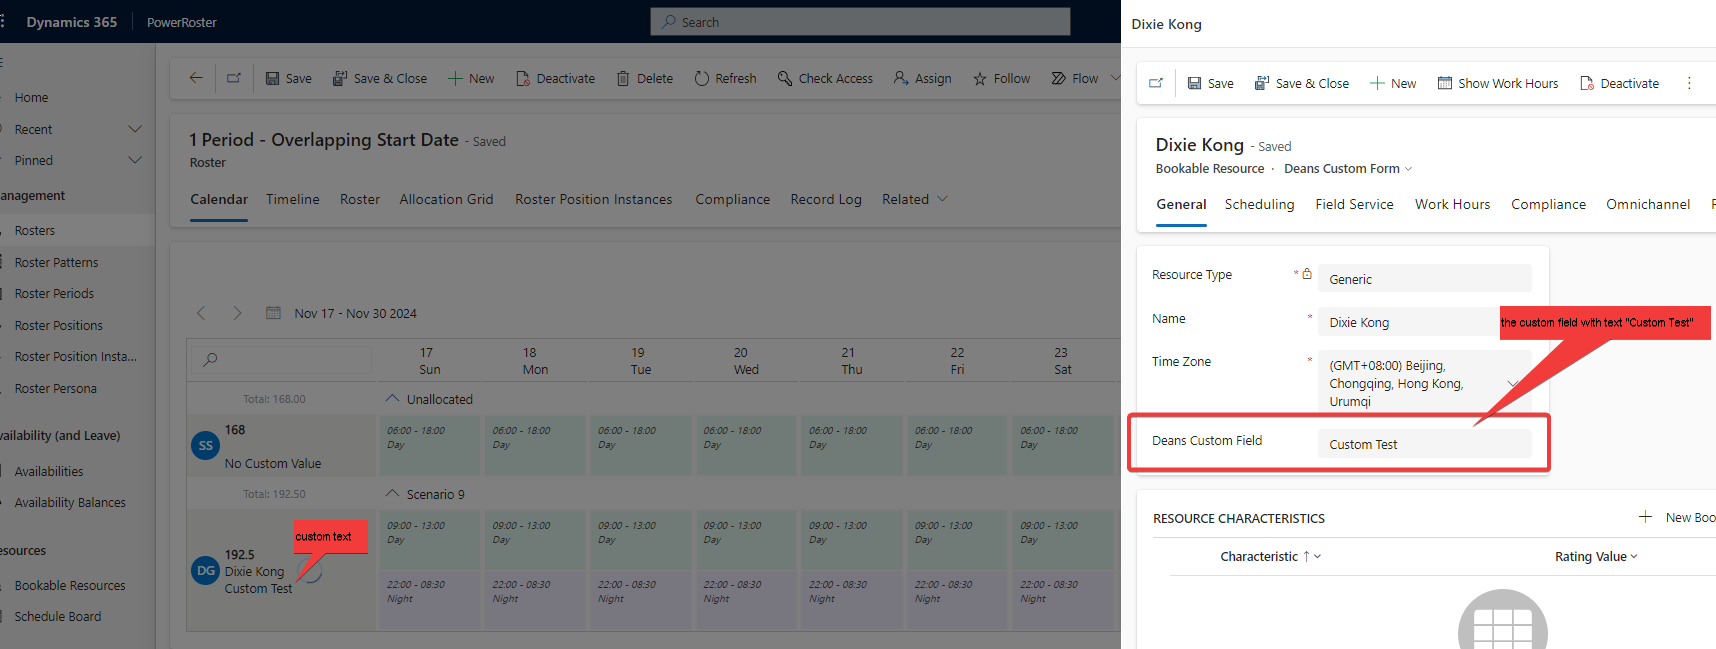
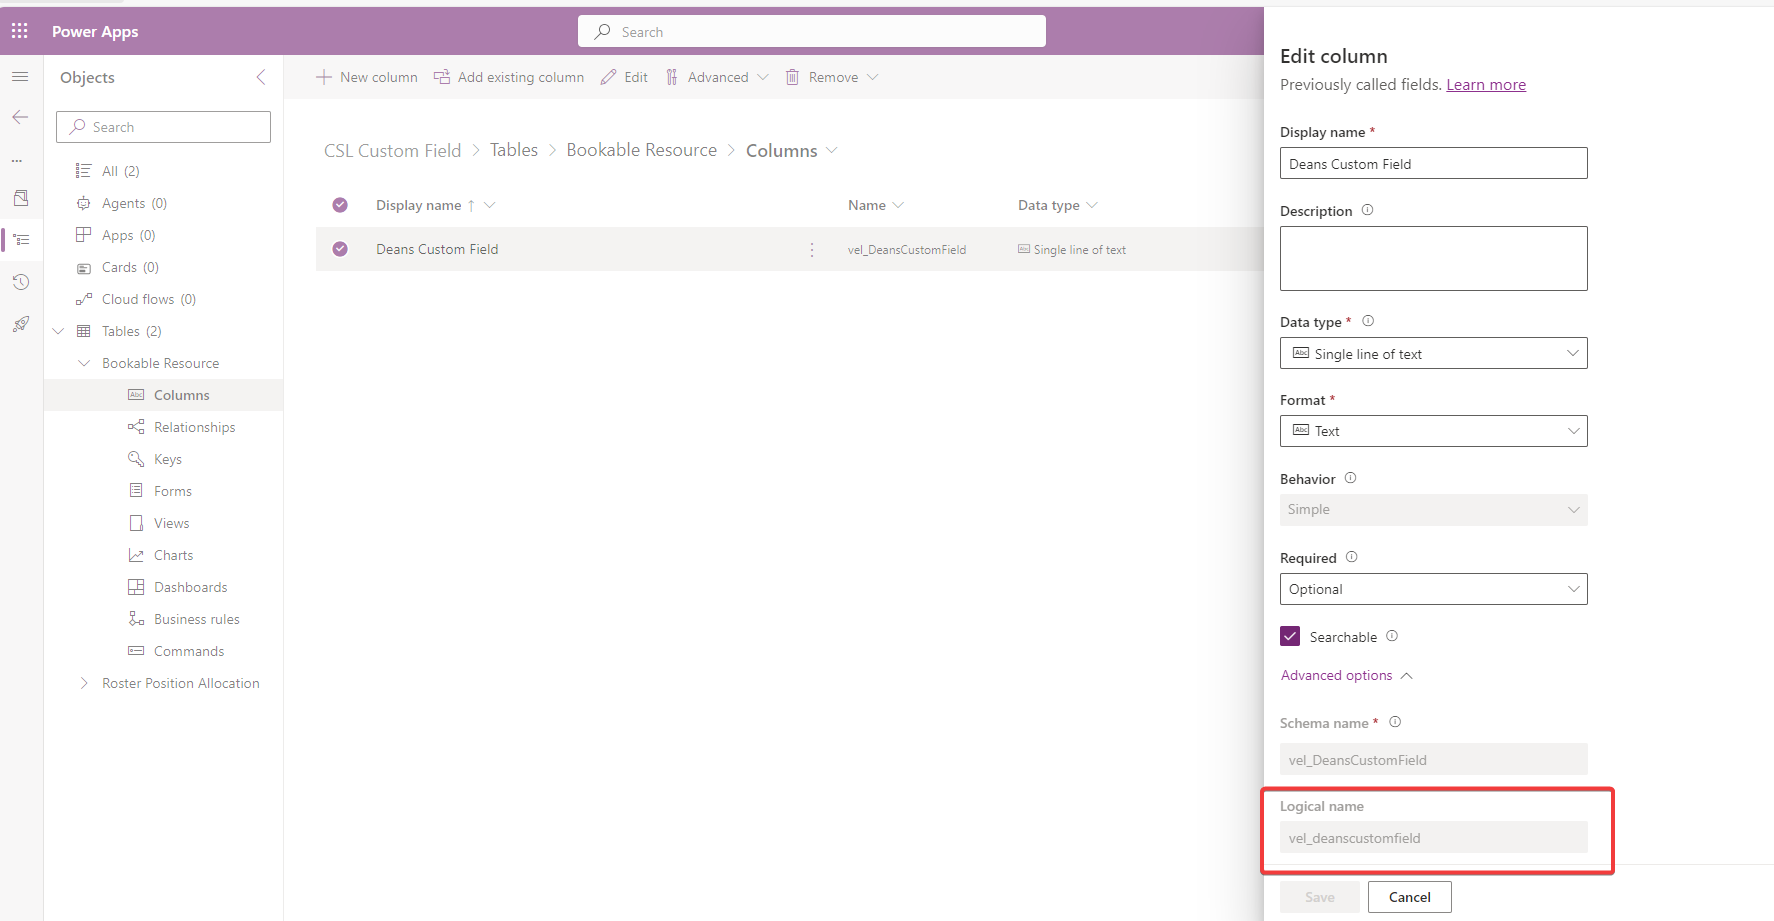
In this example, we will use a custom field added to the Bookable Resource entity named vel_deanscustomfield.
1. Add the field to the FetchXML App Setting
Update the Roster/RosterPCF/PositionAllocationsFetchXml App Setting to include the new field. This ensures the API returns the field value, making it accessible to other configurations.
Example FetchXML with vel_deanscustomfield included:
<fetch>
	<entity name="vel_rosterpositionallocation">
		<attribute name="vel_name" />
		<attribute name="vel_resourceid" />
		<attribute name="vel_index" />
		<attribute name="vel_rosterpositionallocationid" />
		<attribute name="vel_rosterpositionid" />
		<attribute name="vel_startdate" />
		<attribute name="vel_rosterid" />
		<attribute name="versionnumber" />
		<filter>
			<condition attribute="vel_rosterid" operator="eq" value="{{rosterId}}" />
            <condition attribute="statecode" operator="eq" value="0" />
		</filter>
		<link-entity name="bookableresource" from="bookableresourceid" to="vel_resourceid" link-type="outer" alias="resource">
			<attribute name="timezone" />
			<attribute name="contactid" />
			<attribute name="name" />
			<attribute name="resourcetype" />
			<attribute name="userid" />
			<attribute name="bookableresourceid" />
			<attribute name="vel_deanscustomfield" />
			<link-entity name="systemuser" from="systemuserid" to="userid" link-type="outer" alias="user">
				<attribute name="systemuserid" />
				<attribute name="entityimage_url" />
			</link-entity>
		</link-entity>
	</entity>
</fetch>
2. Map the field in the CustomFields App Setting
Next, add the field to the Roster/RosterPCF/CustomFields App Setting. This step maps the FetchXML result into an object you can reference in Persona Cards.
Notice that the resource. prefix matches the alias defined in the FetchXML query.
[
	{
		"name": "vel_shiftopen",
		"type": "boolean",
		"label": "Shift Open",
		"allowGrouping": true
	},
	{
		"name": "resource.vel_deanscustomfield",
		"type": "string",
		"label": "custom field",
		"allowGrouping": true
	}
]
The allowGrouping setting can remain enabled or disabled; it does not impact the Persona Card configuration.
3. Configure the Persona Card Template
The Roster/RosterPCF/PersonaCardConfig App Setting controls the layout of text displayed on each Persona Card.
This setting accepts JavaScript expressions for primary, secondary, and tertiary text, as well as an HTML template.
Below is an example where the custom field is included in the tertiary text:
{
	"primaryText": "(row, rosterSettings) => row.totalRowHours",
	"secondaryText": "(row, rosterSettings) => row.resource?.name || ''",
	"tertiaryText": "(row, rosterSettings) =>row.PositionAllocation?.CustomFields?.['resource.vel_deanscustomfield'].value || 'No Custom Value'",
	"template": "<div><b>{{primaryText}}</b> <br> {{secondaryText}} <br> {{tertiaryText}}<div>"
}
primaryText – shows the total row hours
secondaryText – shows the resource’s name
tertiaryText – shows the custom field, with a fallback label if no value exists
template – combines all text into the card display
Once configured, the custom field will appear directly on the Persona Card in the Roster Calendar.